* Photoshop is available in select computer labs on campus, including the Mac computers in the Library.
To resize an image in Photoshop:
- Open your image in Photoshop.
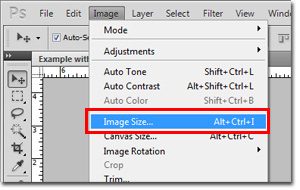
- Go to “Image,” located at the top of the window.
- Select “Image Size.”
- A new window will open.
- To maintain the proportions of your image, click the box next to “Constrain Proportions”.
- Under “Document Size”:
- Select “inches” for the unit of measurement.
- Check that the resolution is no lower than “200 pixels/inch”, however “300 pixels/inch” is ideal for printing.
- Input the width and height you desire.
- If your original image has different proportions than your desired print size, it will be necessary to crop your image after resizing it (see below).
- Click, “OK.”
- Save your file.
- Tip! If you want to keep your original file, select “Save As” and name your image something different from the original.
If you have any additional questions, contact Print & Copy Services at copyservices@pugetsound.edu or 253.879.3737.

